Reverse Engineering using Cutter
In the last tutorial we investigated using assembly for reverse engineering by using IDA to observe the assembly code of the executable. Understanding assembly is incredibly useful and allows one to understand how the internals of the program are working. However sometimes figuring and reversing the logic of the program using just assembly becomes extremely difficuly especially if the program is complicated.
Fortunately a different class of programs known as decompilers allow us to essentially get the pseudocode from the assembly generated and use this to reverse the program. Ofcourse this code won’t be perfect and in most cases it won’t run. But analysing this pseudocode is far easier than working with assembly and we will be seeing how we can use this to solve problems.
We will be using the ghidra decompiler written by the National Security Agency (it is opensourced so you don’t have to worry about security risks). ghidra is a complete reversing toolkit which is very powerful however it can be a bit non friendly to use. Instead we will use cutter which is based on the radare2 platform and uses ghidra for decompilation.
Installing Cutter
You’ll first have to install radare2 which provides a lot of tools for disassembly and reversing via the terminal.
Follow this link to get the binary installer for your platform.
Once this is done you can simply download the cutter appimage from here
The appimage file can simply be doubleclicked to run cutter. You will have to set it up as an allowed executable though. You can do this by simplying running the following command:
chmod +x Cutter-v1.10.3-x64.Linux.AppImageNow double click the appimage to run Cutter.
Solving a crackme using Cutter and Ghidra
We will demonstrate how to use cutter using this crackme.
Crackmes.one has a lot of files that you need to crack and this is a relatively simple one. It’s called ZED-Frequency. Let’s try running it (remember you may need to chmod+x so that this executable can be run.):

It seemst that you need to pass a keyfile. Let us create a simple file with the text “CSEAIITB” and pass it as a keyfile.
So a particular key is generated from this text. We need to figure out the correct key and what generates this key. This is the challenge. Let’s load this file in cutter.
Open cutter and load this file. Keep on clicking okay we want to use the default settings. You end up here:

Firstly let’s enable the decompiler. Go to Windows on the menu bar and click on Decompiler. You should see Decompiler now on the bottom. It will load the decompiled code for entry0. We want to however investigate the main function so doubleclick on main in the left side.
This is the code that ghidra gave to us. It may seem complicated but let’s analyse it. Firstly observe that there is a lot of hex codes flying around. Those are simply the memory locations (think pointer values) being passed on. If you click on strings in the bottom you’ll find what values these pointers are pointing to.
Anyway if you observe it seems that uVar2 is storing the file data from the command line argv. Also at the end you will see that if iVar1==0 (which occurs when s1 is equal to the string at 0xb16) something happens. Let’s go to strings and see.
So if s1 is equal to 01234567890123456789012345 we succeed. This is the key.
How do we get this though? If you look at the source you’ll see that s1 basically is the string form of the data in the array a1Stack168 where the indexing happens from 0 to 26.
How is this array getting these values? Observe the main while loop. It seems that the values get updated by considering every character in the input file and updating some value. The 0x41 value appears a lot which is the ASCII for A.
I will leave it to you to see that well this coding is doing nothing but counting the number of occurences of every character from A to Z. So a 0 in the key at the first position means there is no A and so on.
We can then easily generate the key!
The following python code generates the key:
f = open("key.txt", "w")
final_key = ""

for _ in range(26):
	final_key += chr(65+_)*(_%10)

f.write(final_key)
f.close()
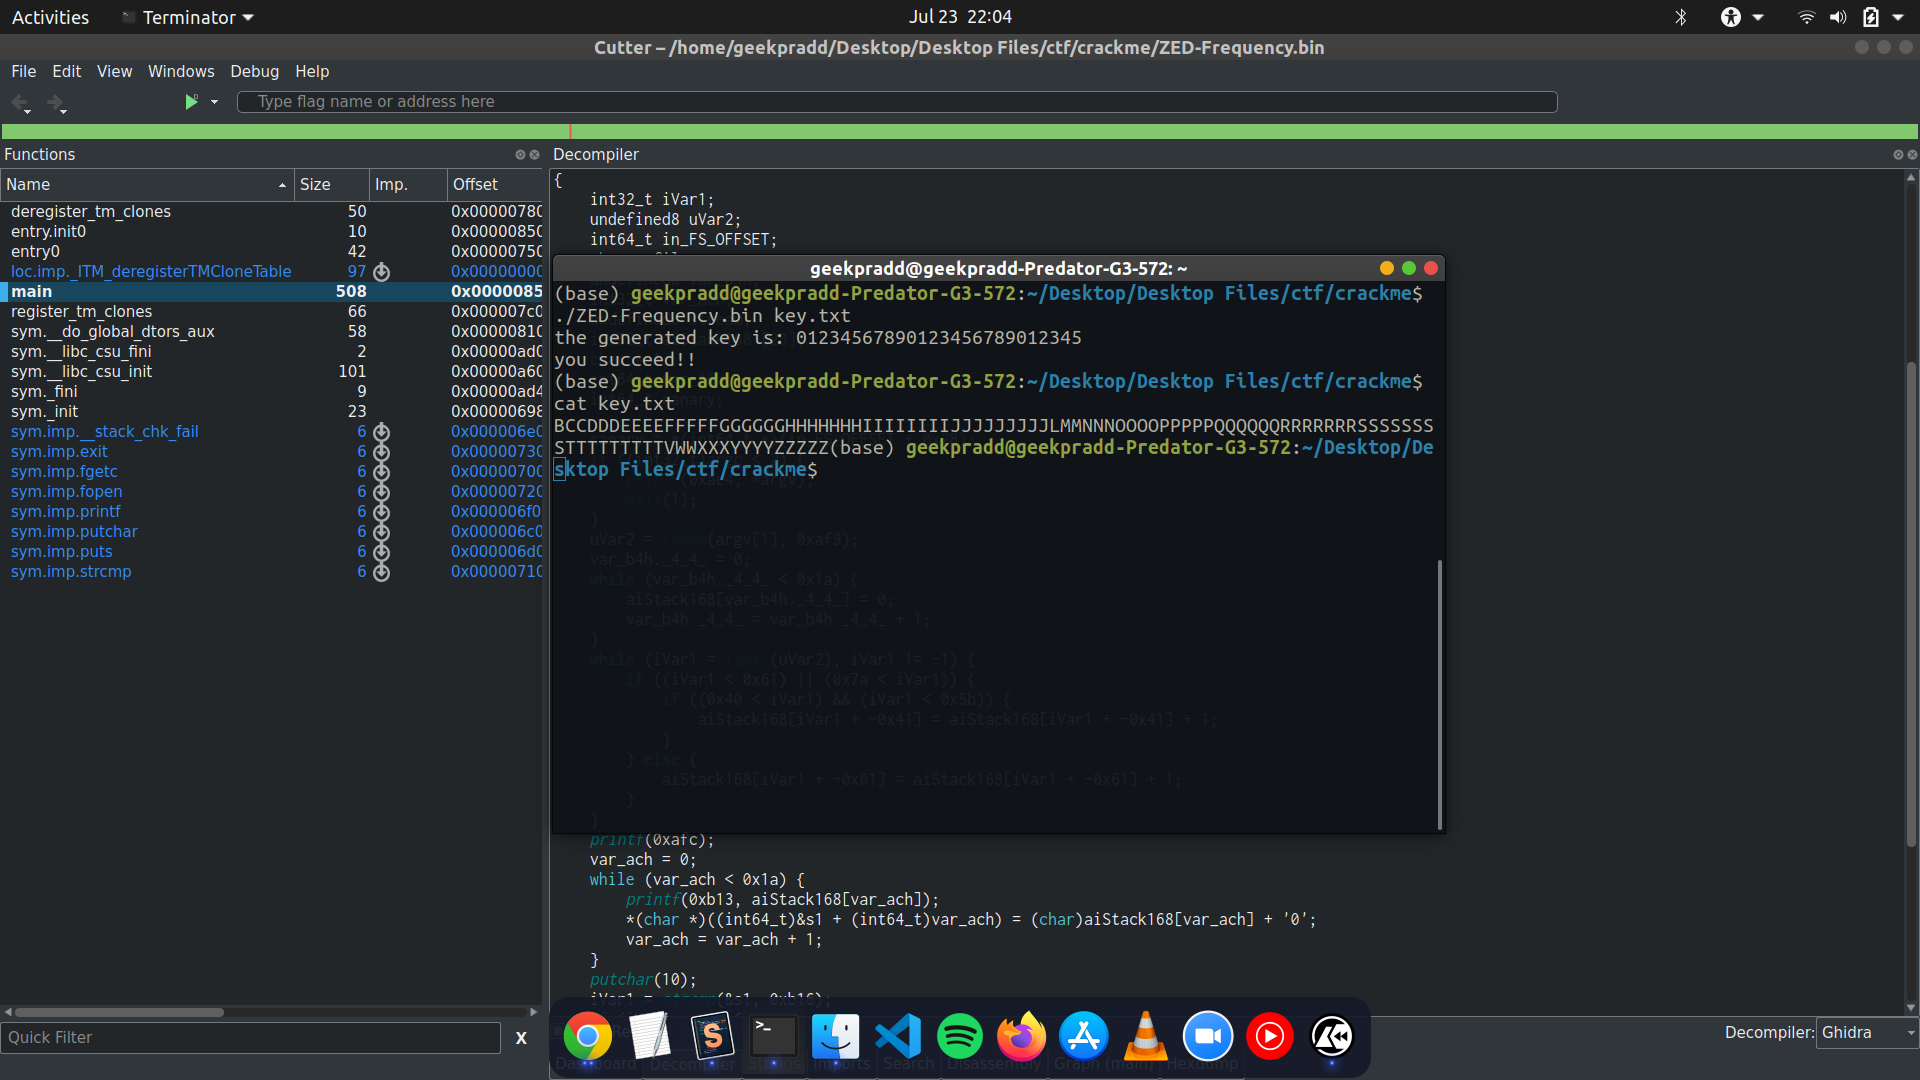
Now if we pass this key to the program we see the following output:

That sums up this crackme. This was a pretty simple example which was made extremely simple using a decompiler. This tool is very useful for complex ctf problems where having a code to go back to while at the same time looking at the assembly can be useful.